This time last year I was newly unemployed, and there was a lot of extra free time for things like cooking, yard work, and some amazing craft projects (of course there were other moments filled with resume tweaking, job searching, panic, anxiety, and lots and lots of yoga) After trimming most of the fruit trees in my yard, I was looking for something creative to do with the branches… I made a few arrangements, gave some away to people to use in weddings, and then finally settled into making these super simple heart wreaths.
With Valentines day right around the corner, and tree trimming season in full swing, it’s the perfect time to have a crafternoon and make a rustic heart wreath or two. Last year I handed these out as my valentines, and this year I’m actually selling them at Red Hills Market in Dundee. If you don’t feel like making one yourself, you know where to go.
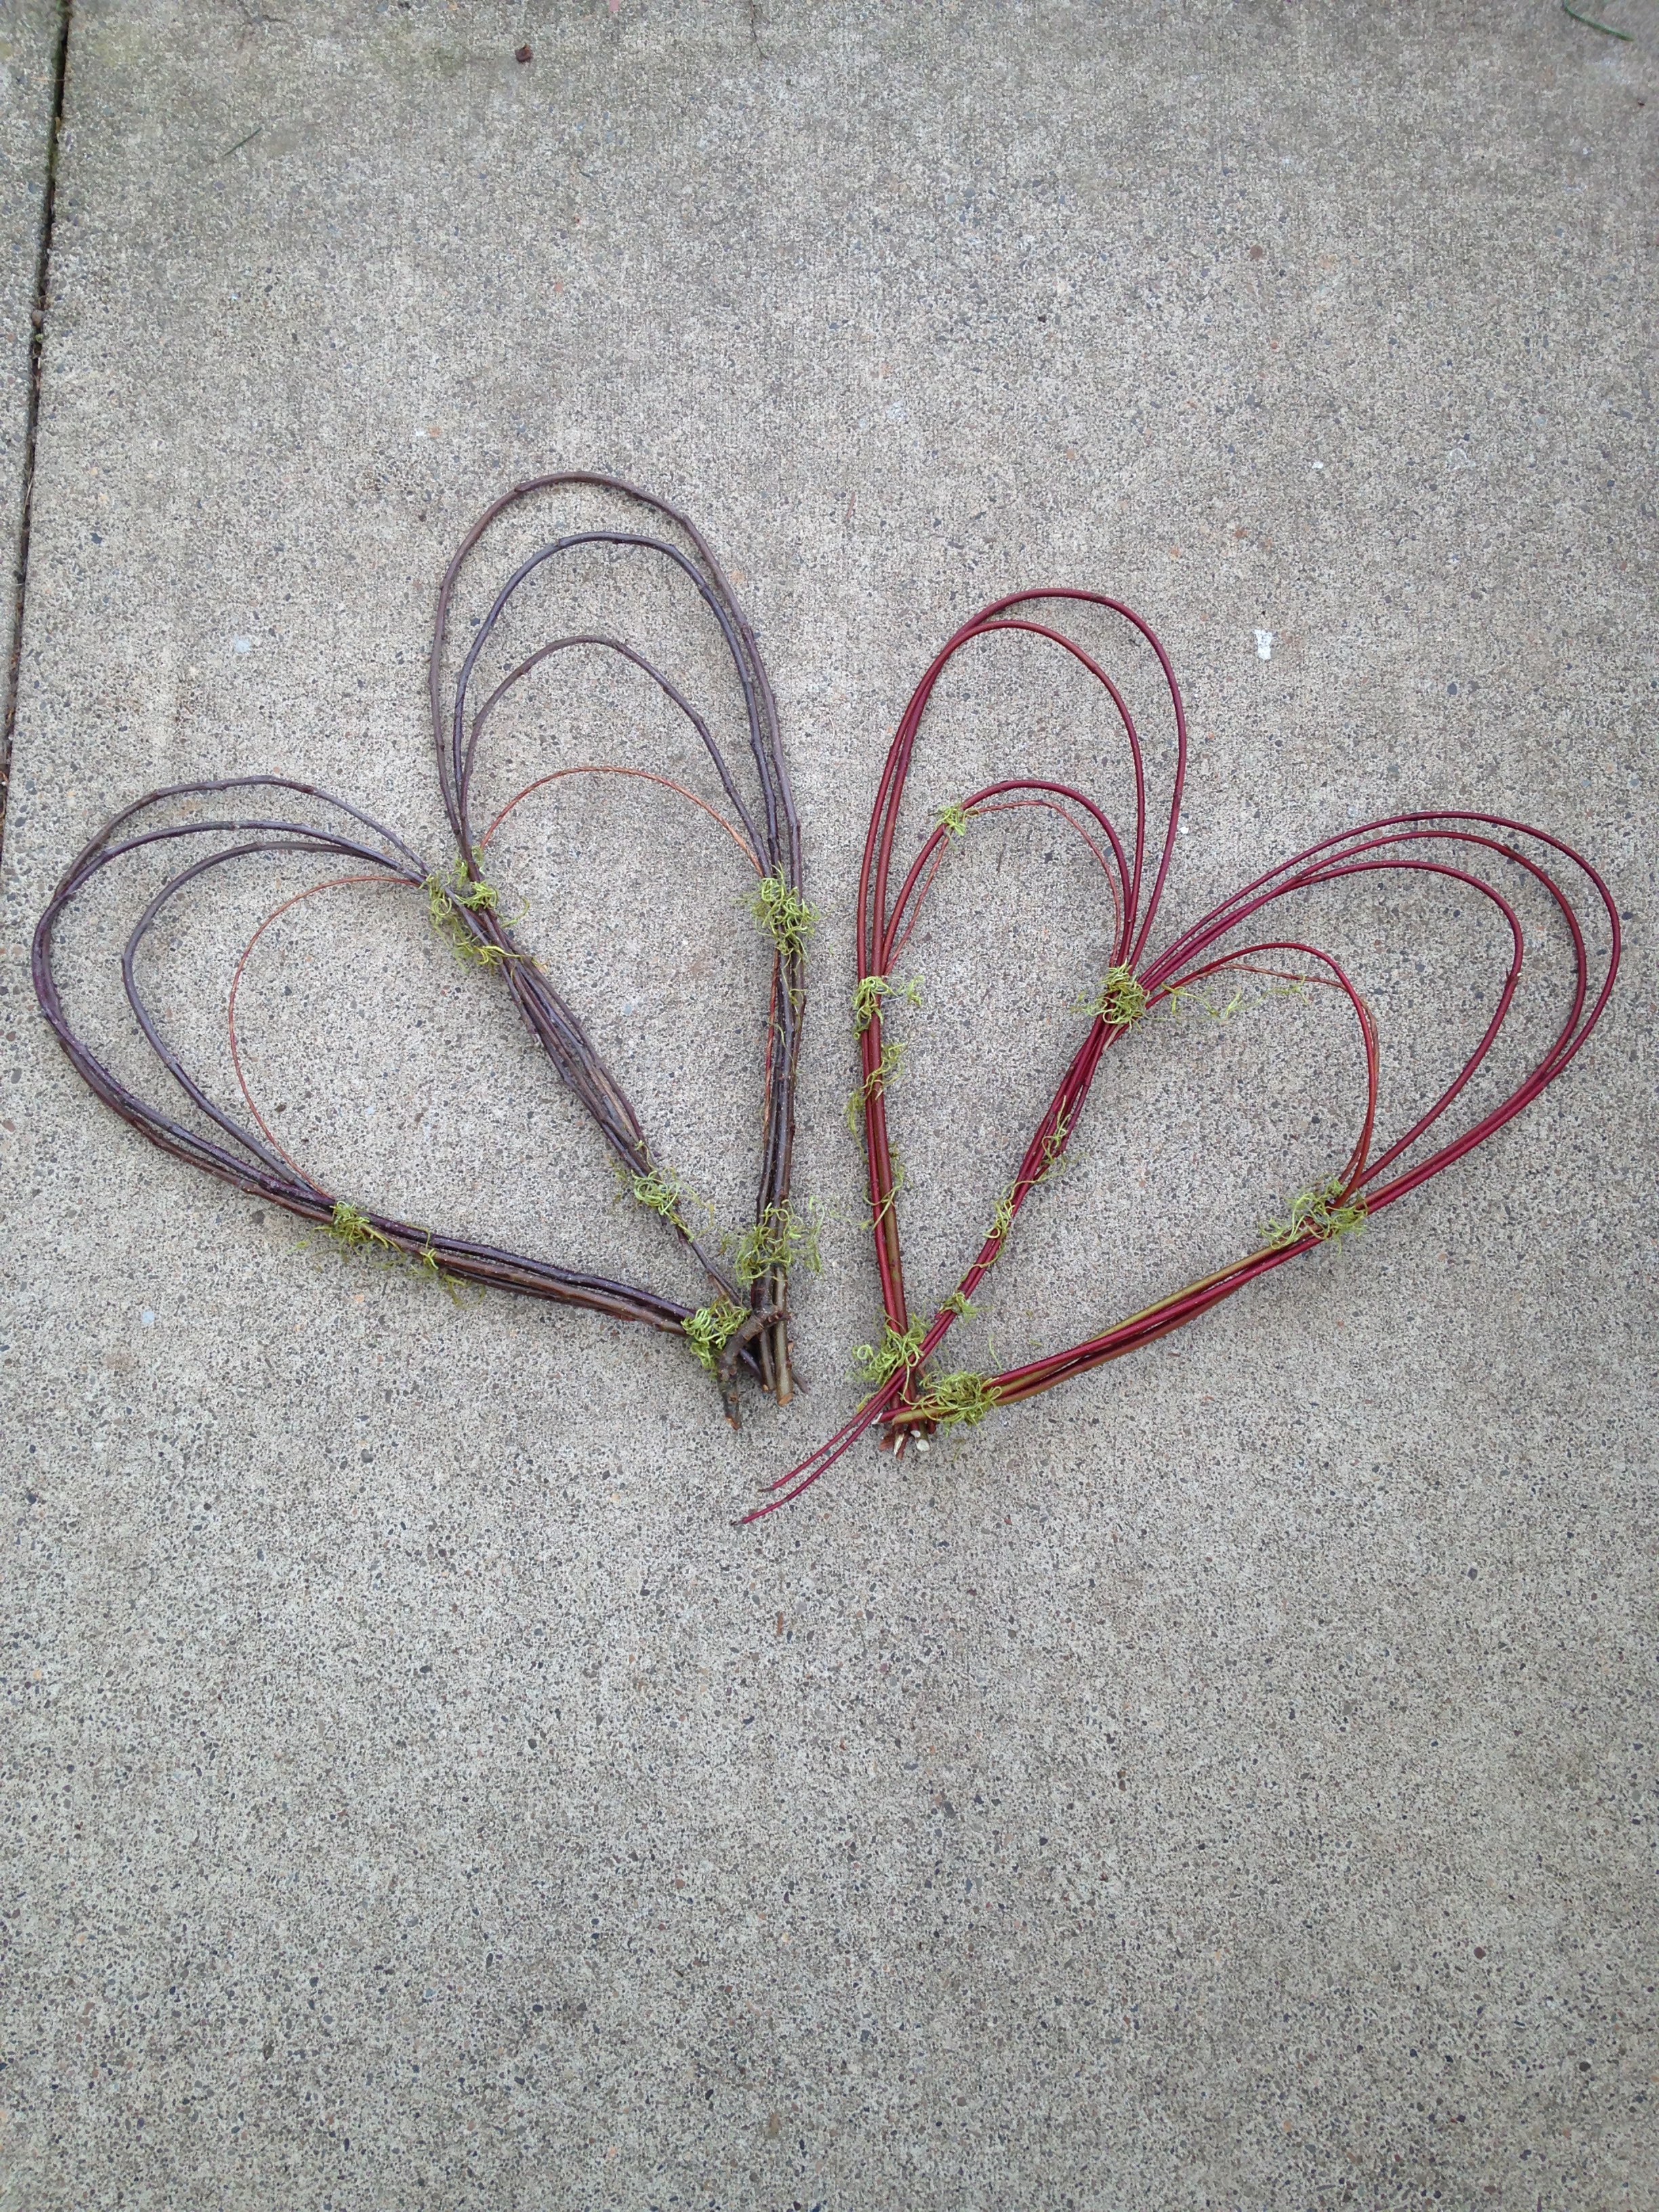
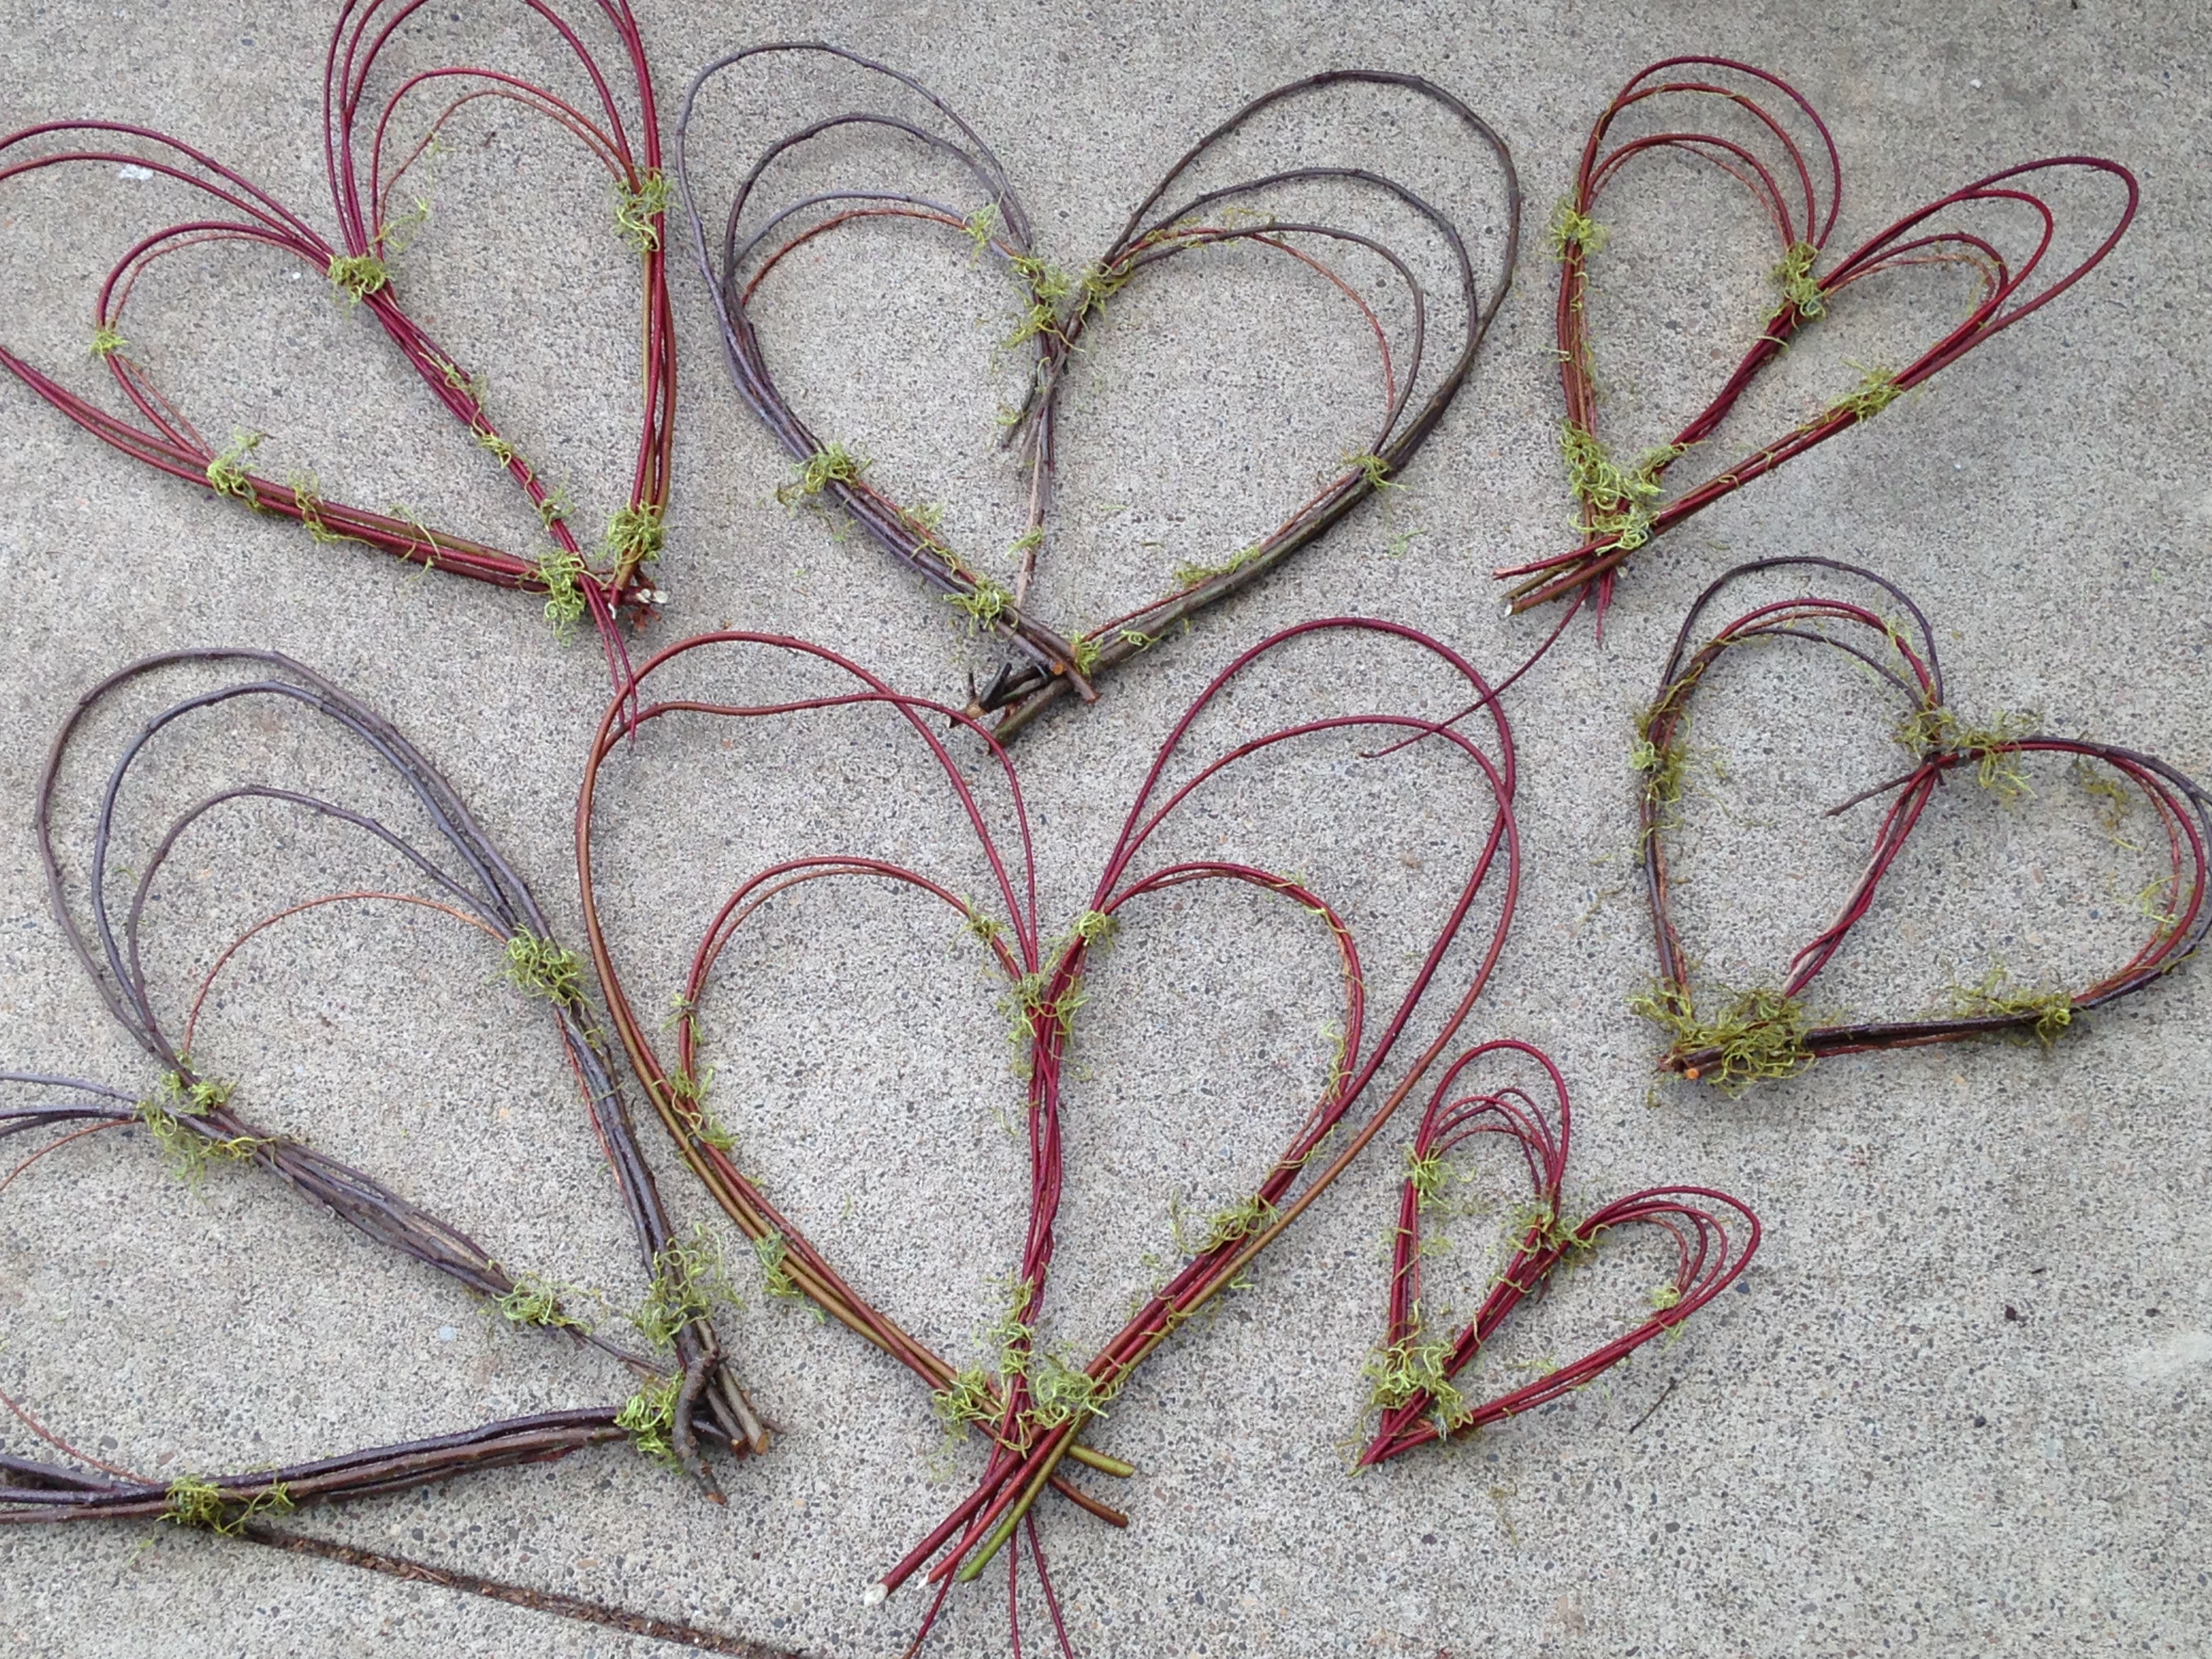
rustic heart duo
Rustic Home Made Heart Wreath in 10 Easy Steps.
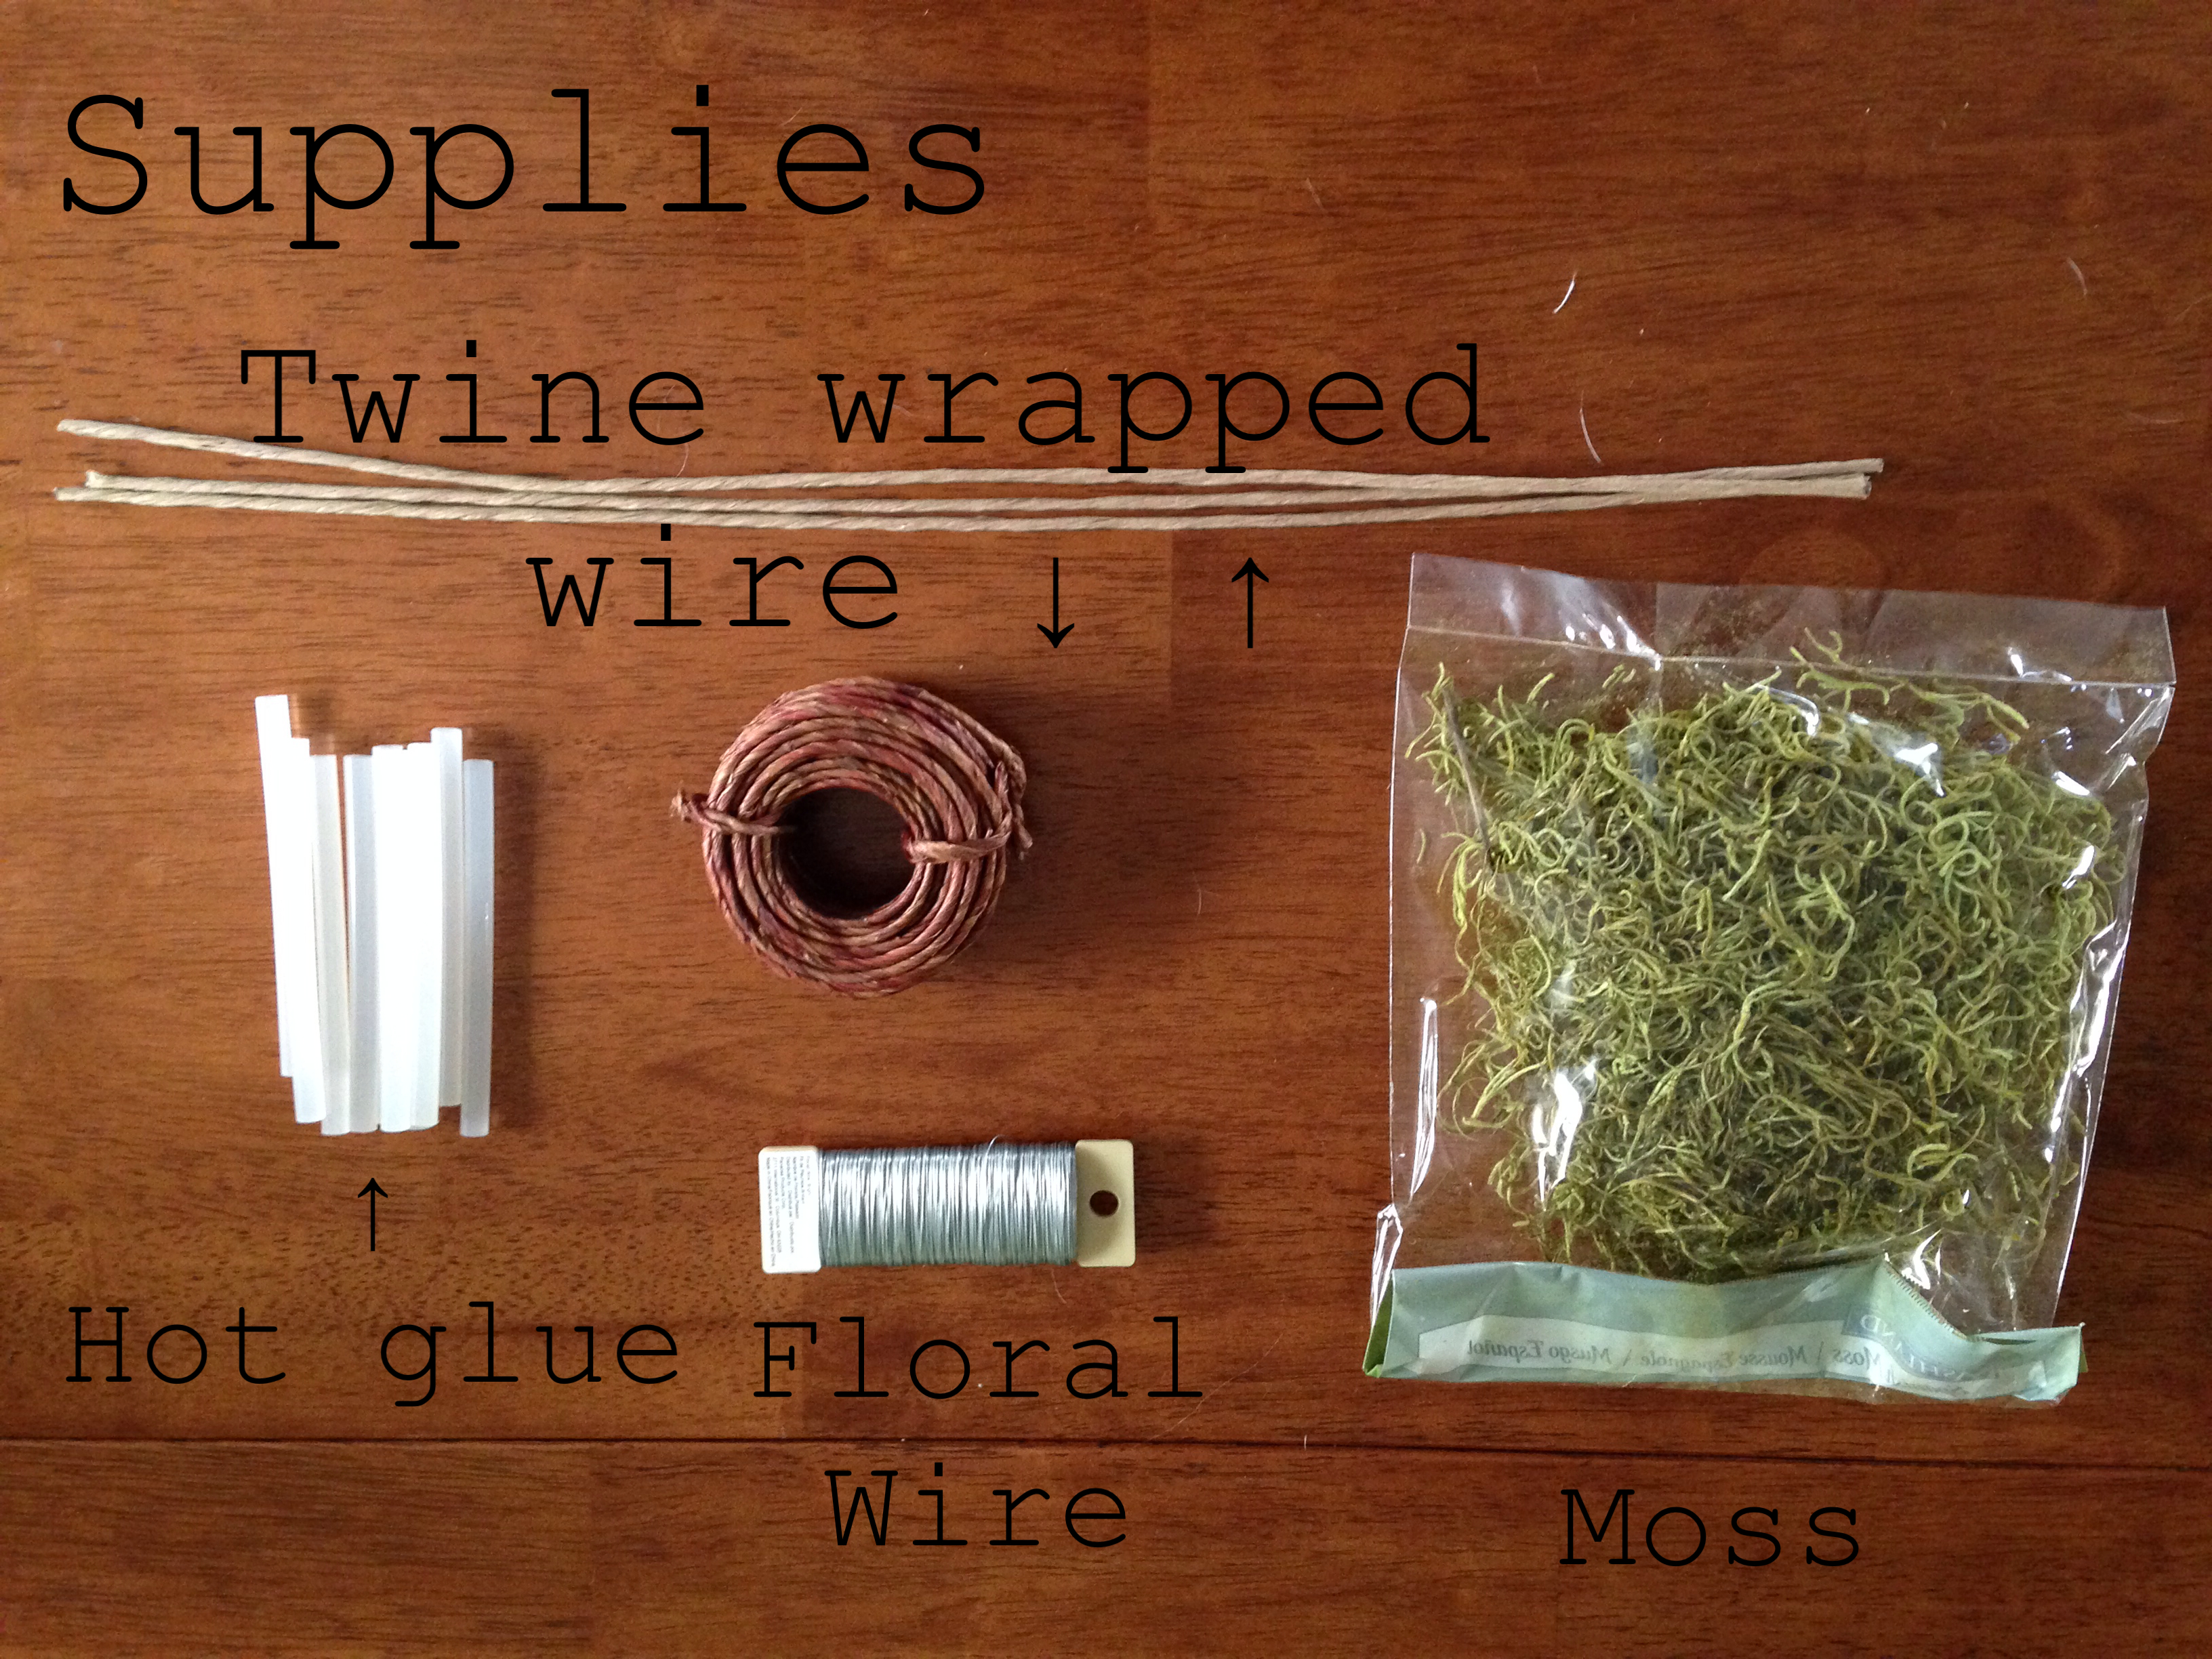
What you will need:
- Twine wrapped wire
- Floral wire
- Hot glue gun/ hot glue
- Spanish moss
- Approximately 6 branches/twigs
- Wire cutters
- Optional: brown floral tape
I recommend using fresh cuttings as they tend to be a little more bendy/ pliable. However, trimmed branches that are left out in the elements/ rain for a few days will probably work just as well. This year I’ve been using apple and Red Twig Dogwood. Other suggestions would be cherry, plumb, crab apple or forsythia.
Prep. Take a handful of reindeer moss out of the package and place it in a bowl. Lay out branches in a neat pile. Turn on some music, and if you are over 21, pour yourself a glass of wine. Crafting is so much better with a glass of wine.
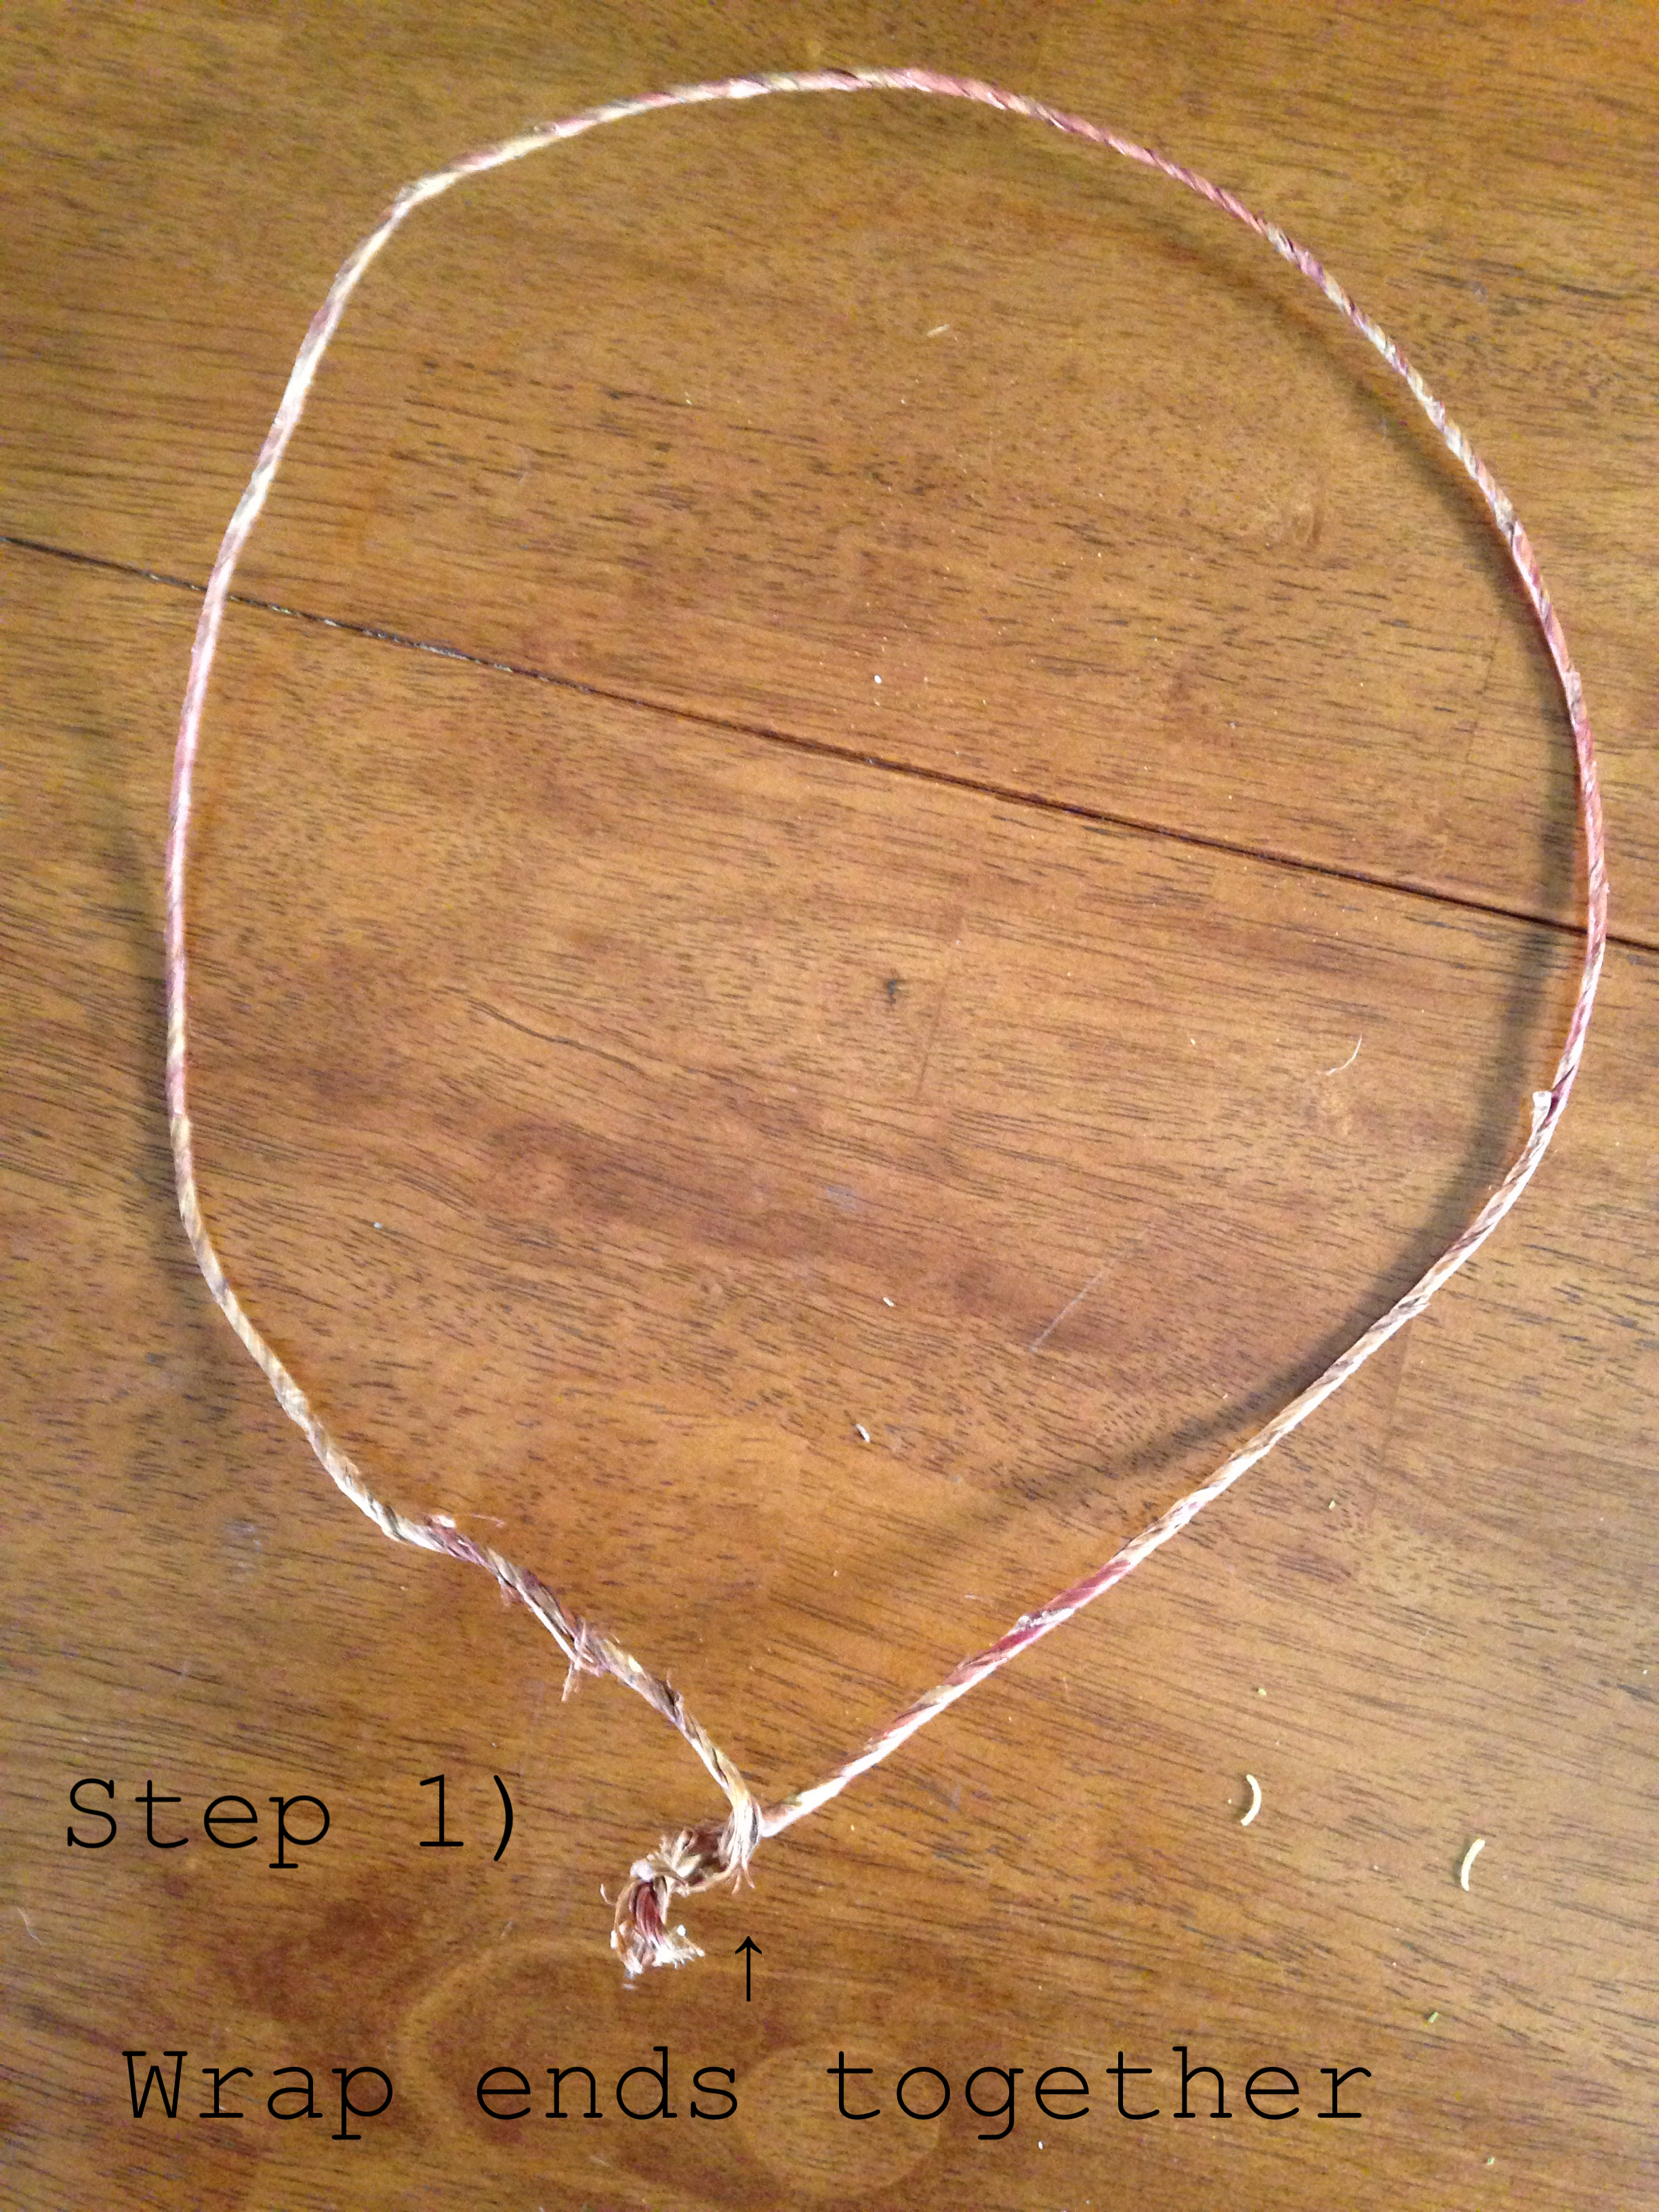
Step 1) Decide what size wreath you want to make. (this may depend on the size of your cuttings etc.) Cut the twine wrapped wire to desired size and make a circle, wrapping the ends together.
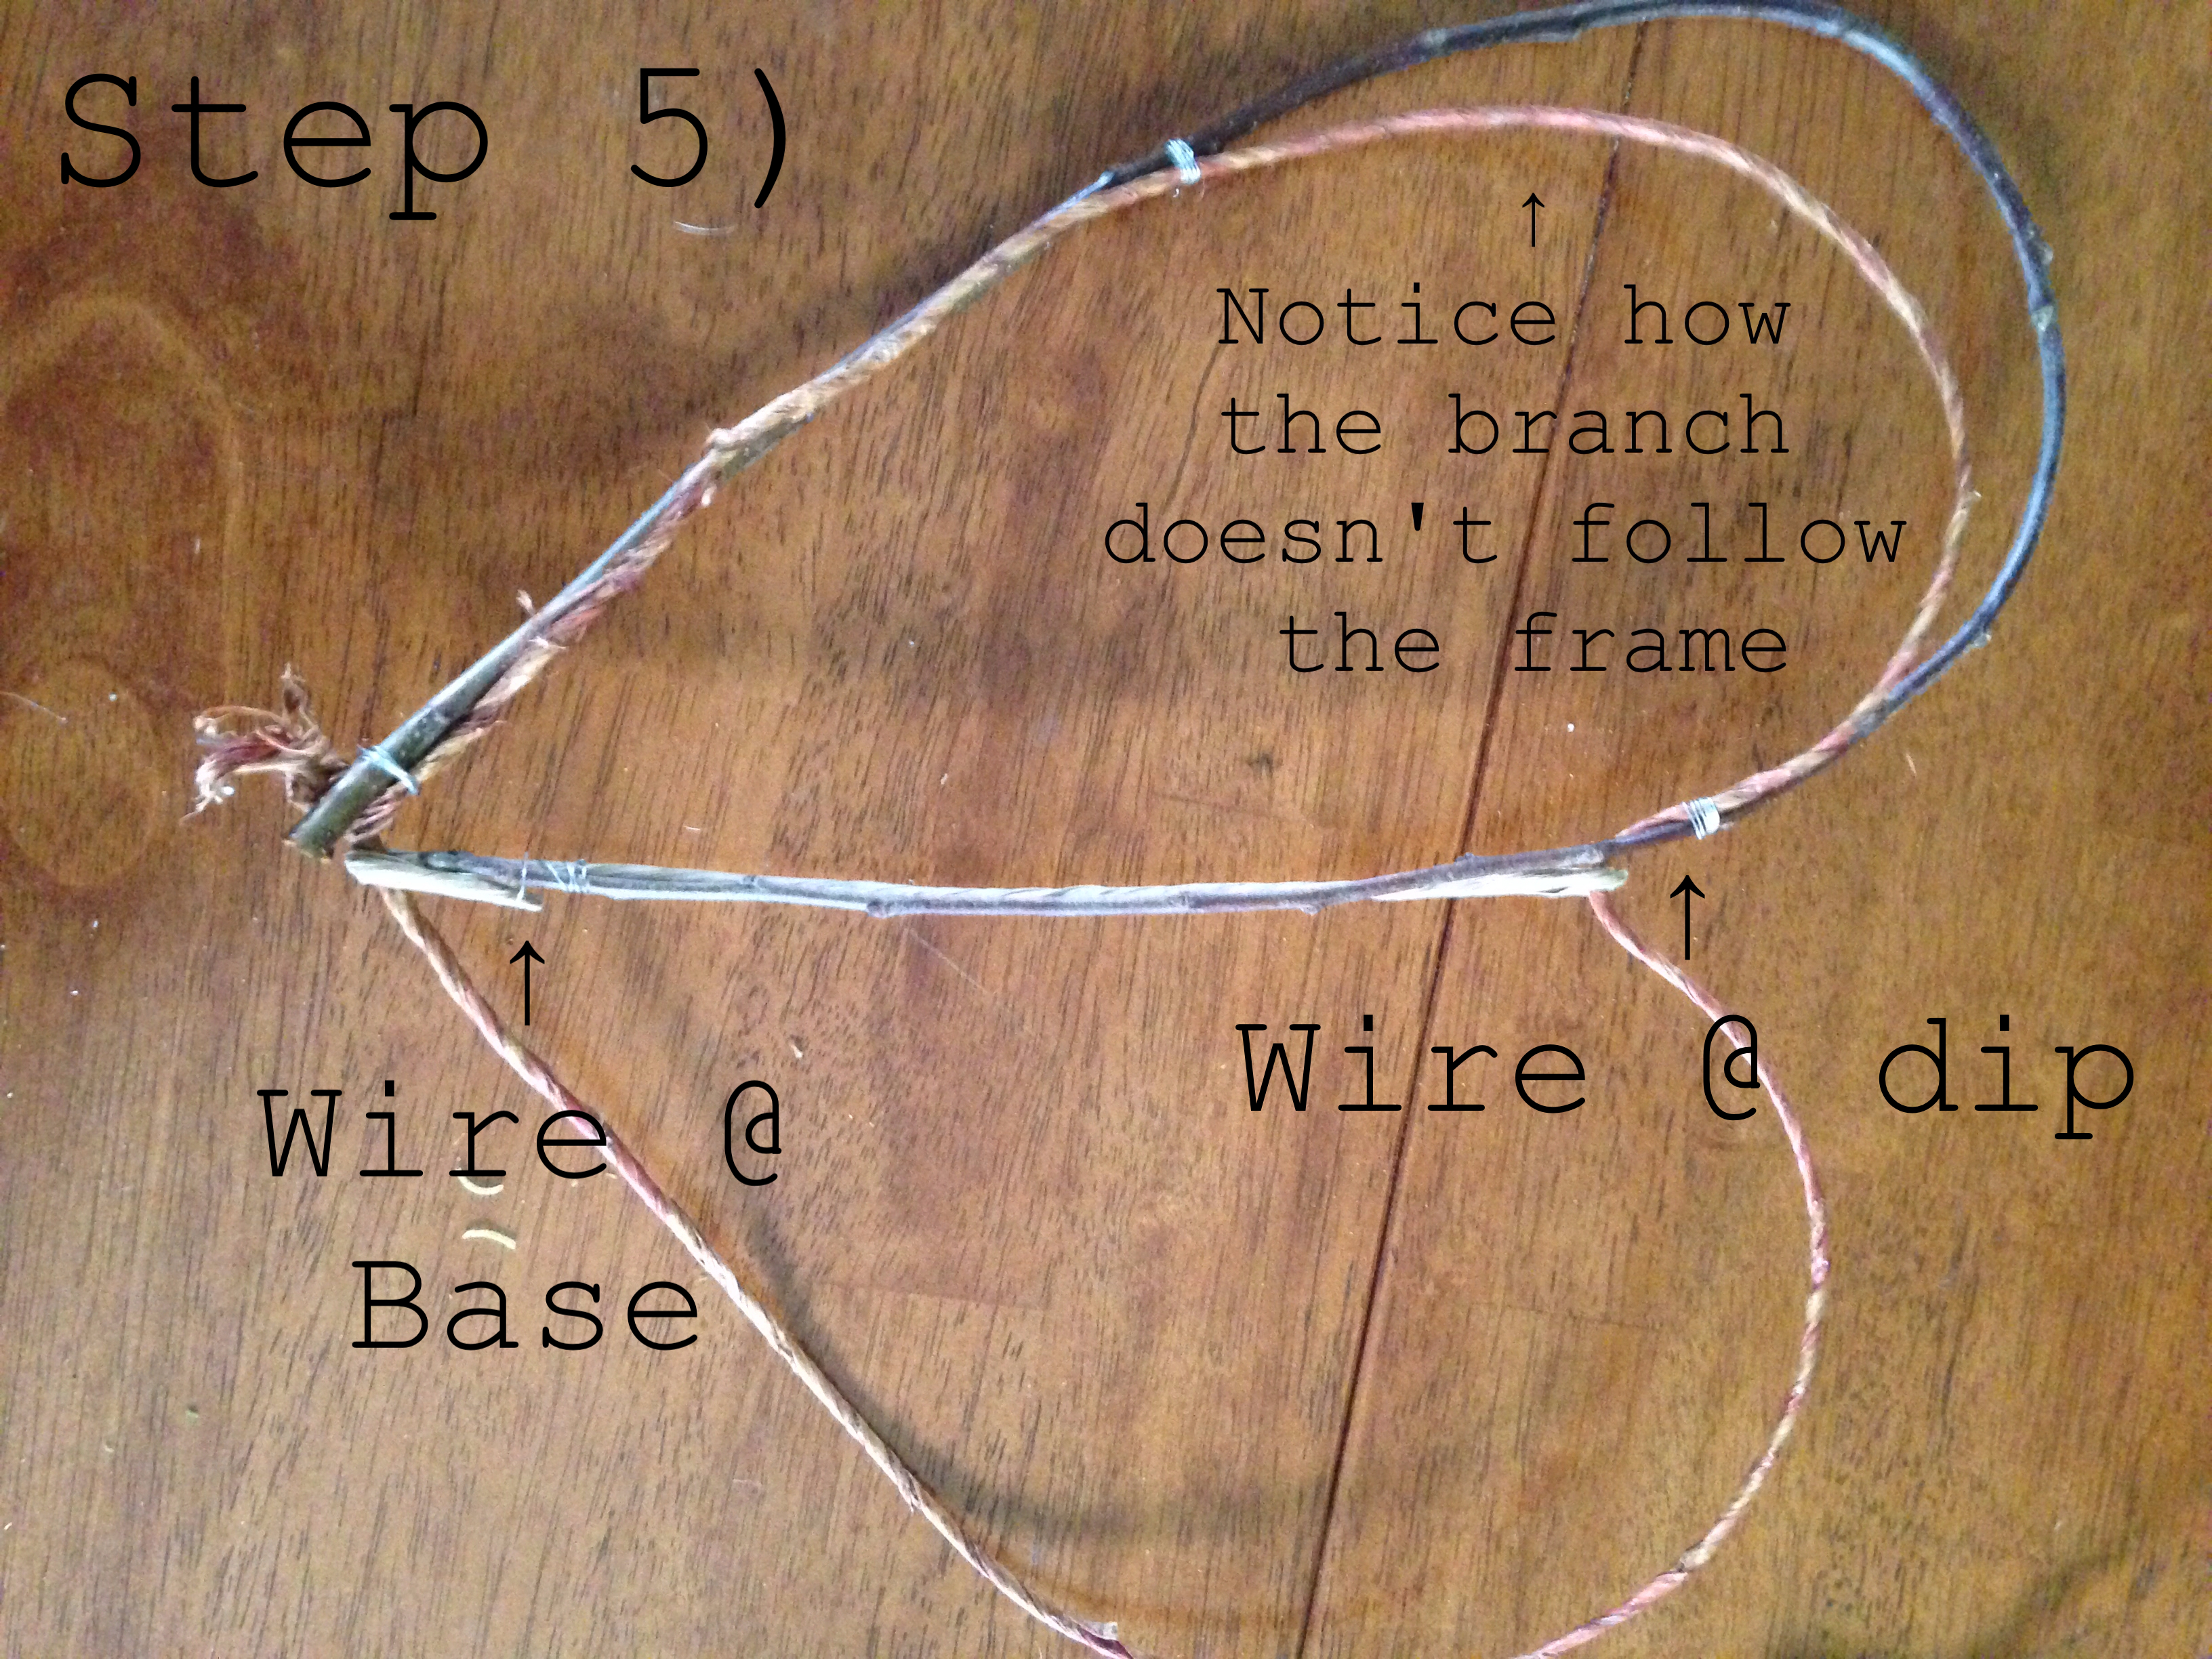
Step 2) Form the wire circle into a heart shape (does not have to be exactly the shape you want the wreath, its just a guideline) Then measure the distance between the dip of the heart and the bottom point of the heart. Cut another piece of the twine wrapped wire and anchor the dip and the point together. *This step is actually pretty important, because the branches have a lot of spring to them, and without the anchoring of the two points, the branches will start to pull the wreath back into a circle.

Step 3) take the floral wire, and one of the branches, and start wrapping the wire around the branch, attaching the base of the branch to the base of the heart frame. Make 4-6 loops (this depends on how thick of a branch or twig you are using… it doesn’t need to be perfectly secure, as we will reinforce a little later with hot glue) Cut the wire, and smooth the edges down as much as possible. You will be working on one side of the wreath with this branch, and then starting to build the second side with the next branch.
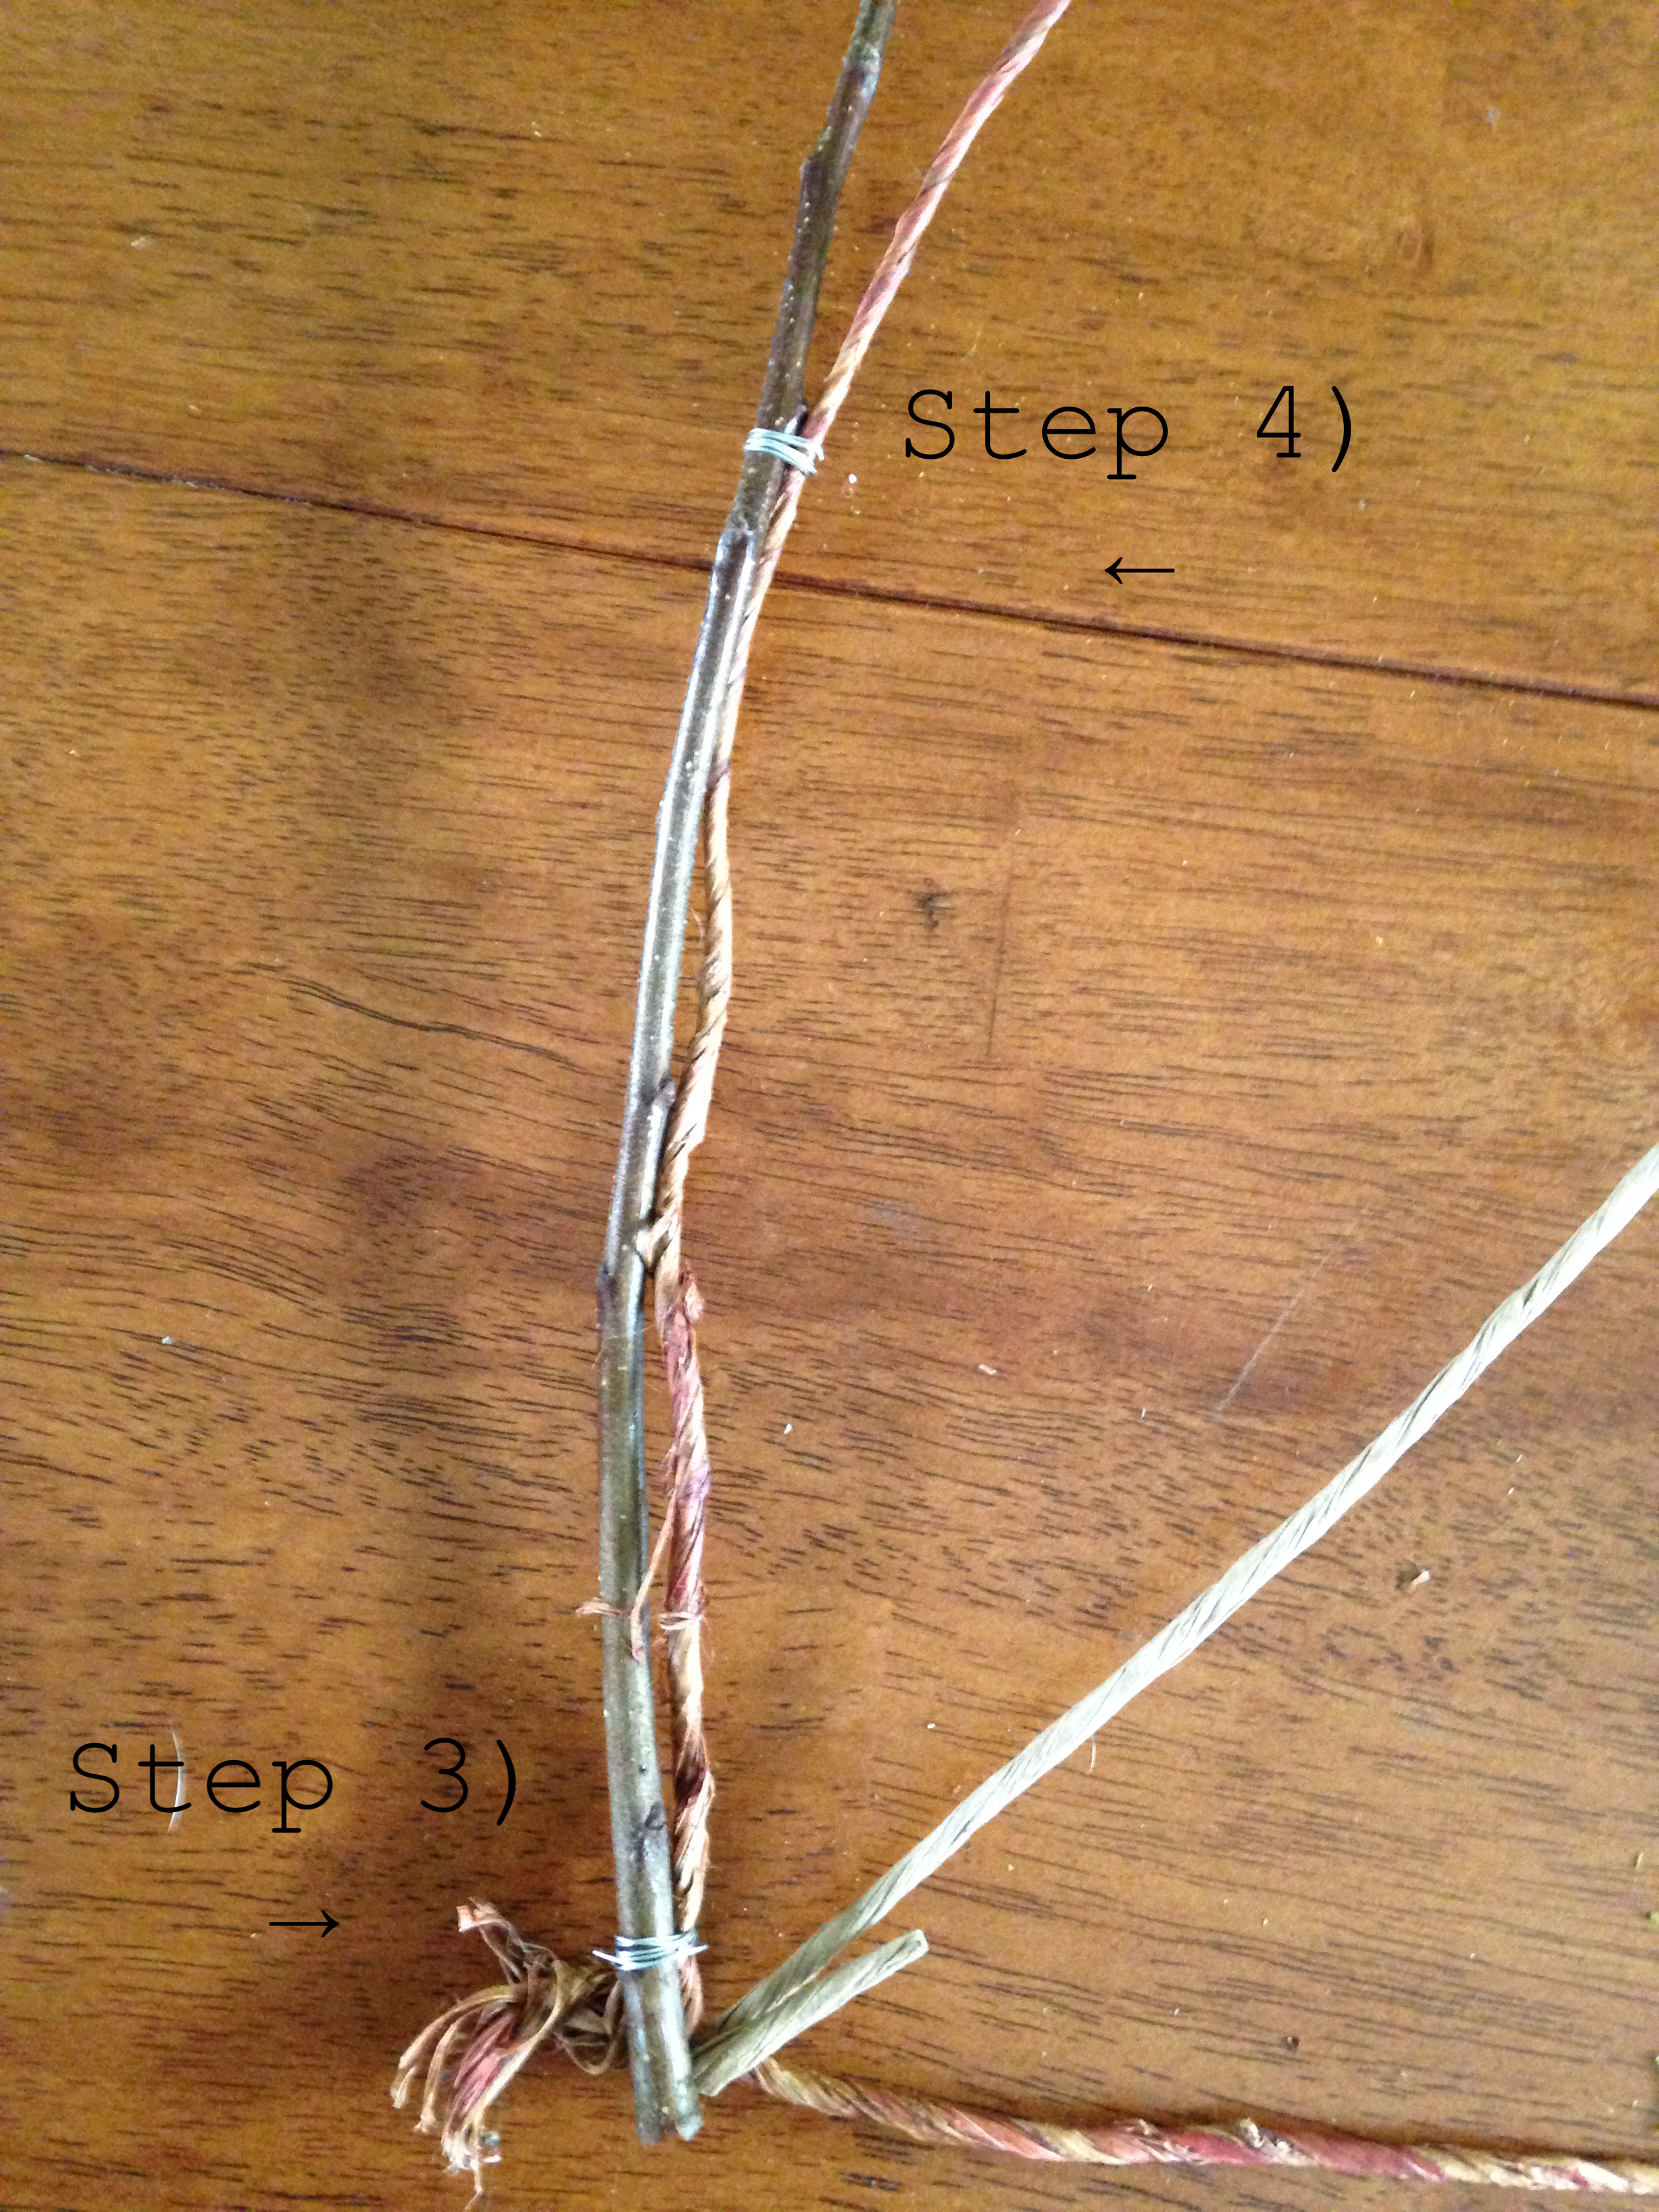
attaching the branch to the frame
Step 4) Repeat step 3 higher up on the frame, securing the branch to the heart frame fairly close to where the frame begins to curve.
Step 5) being to bend the branch to make a half heart. At this point the branch doesn’t need to follow the lay-out of the heart frame. Secure the branch to the frame close to the dip of the top of the heart. And once more on the center anchoring wire close to the base of the heart. (Since you need the anchoring wire, I like to make the branches come all the way through the middle of the heart)
Step 6) Repeat steps 3-5 on the second side. Keep in mind, you will be covering the wire with moss when the wreath is finished. You should decide if you want the mossy patches to be symmetrical from side to side or if you want them to be a little more random. This will dictate where on the wreath you secure the branches to the frame.
Step 7) Take the next branch and begin to repeat steps 3-5 on the first side. Trying to wrap the wire in the same places on each side. This will get a little bulky as you keep adding branches, but keep wrapping and pulling the wire tight to secure the branches. Repeat on the second side.
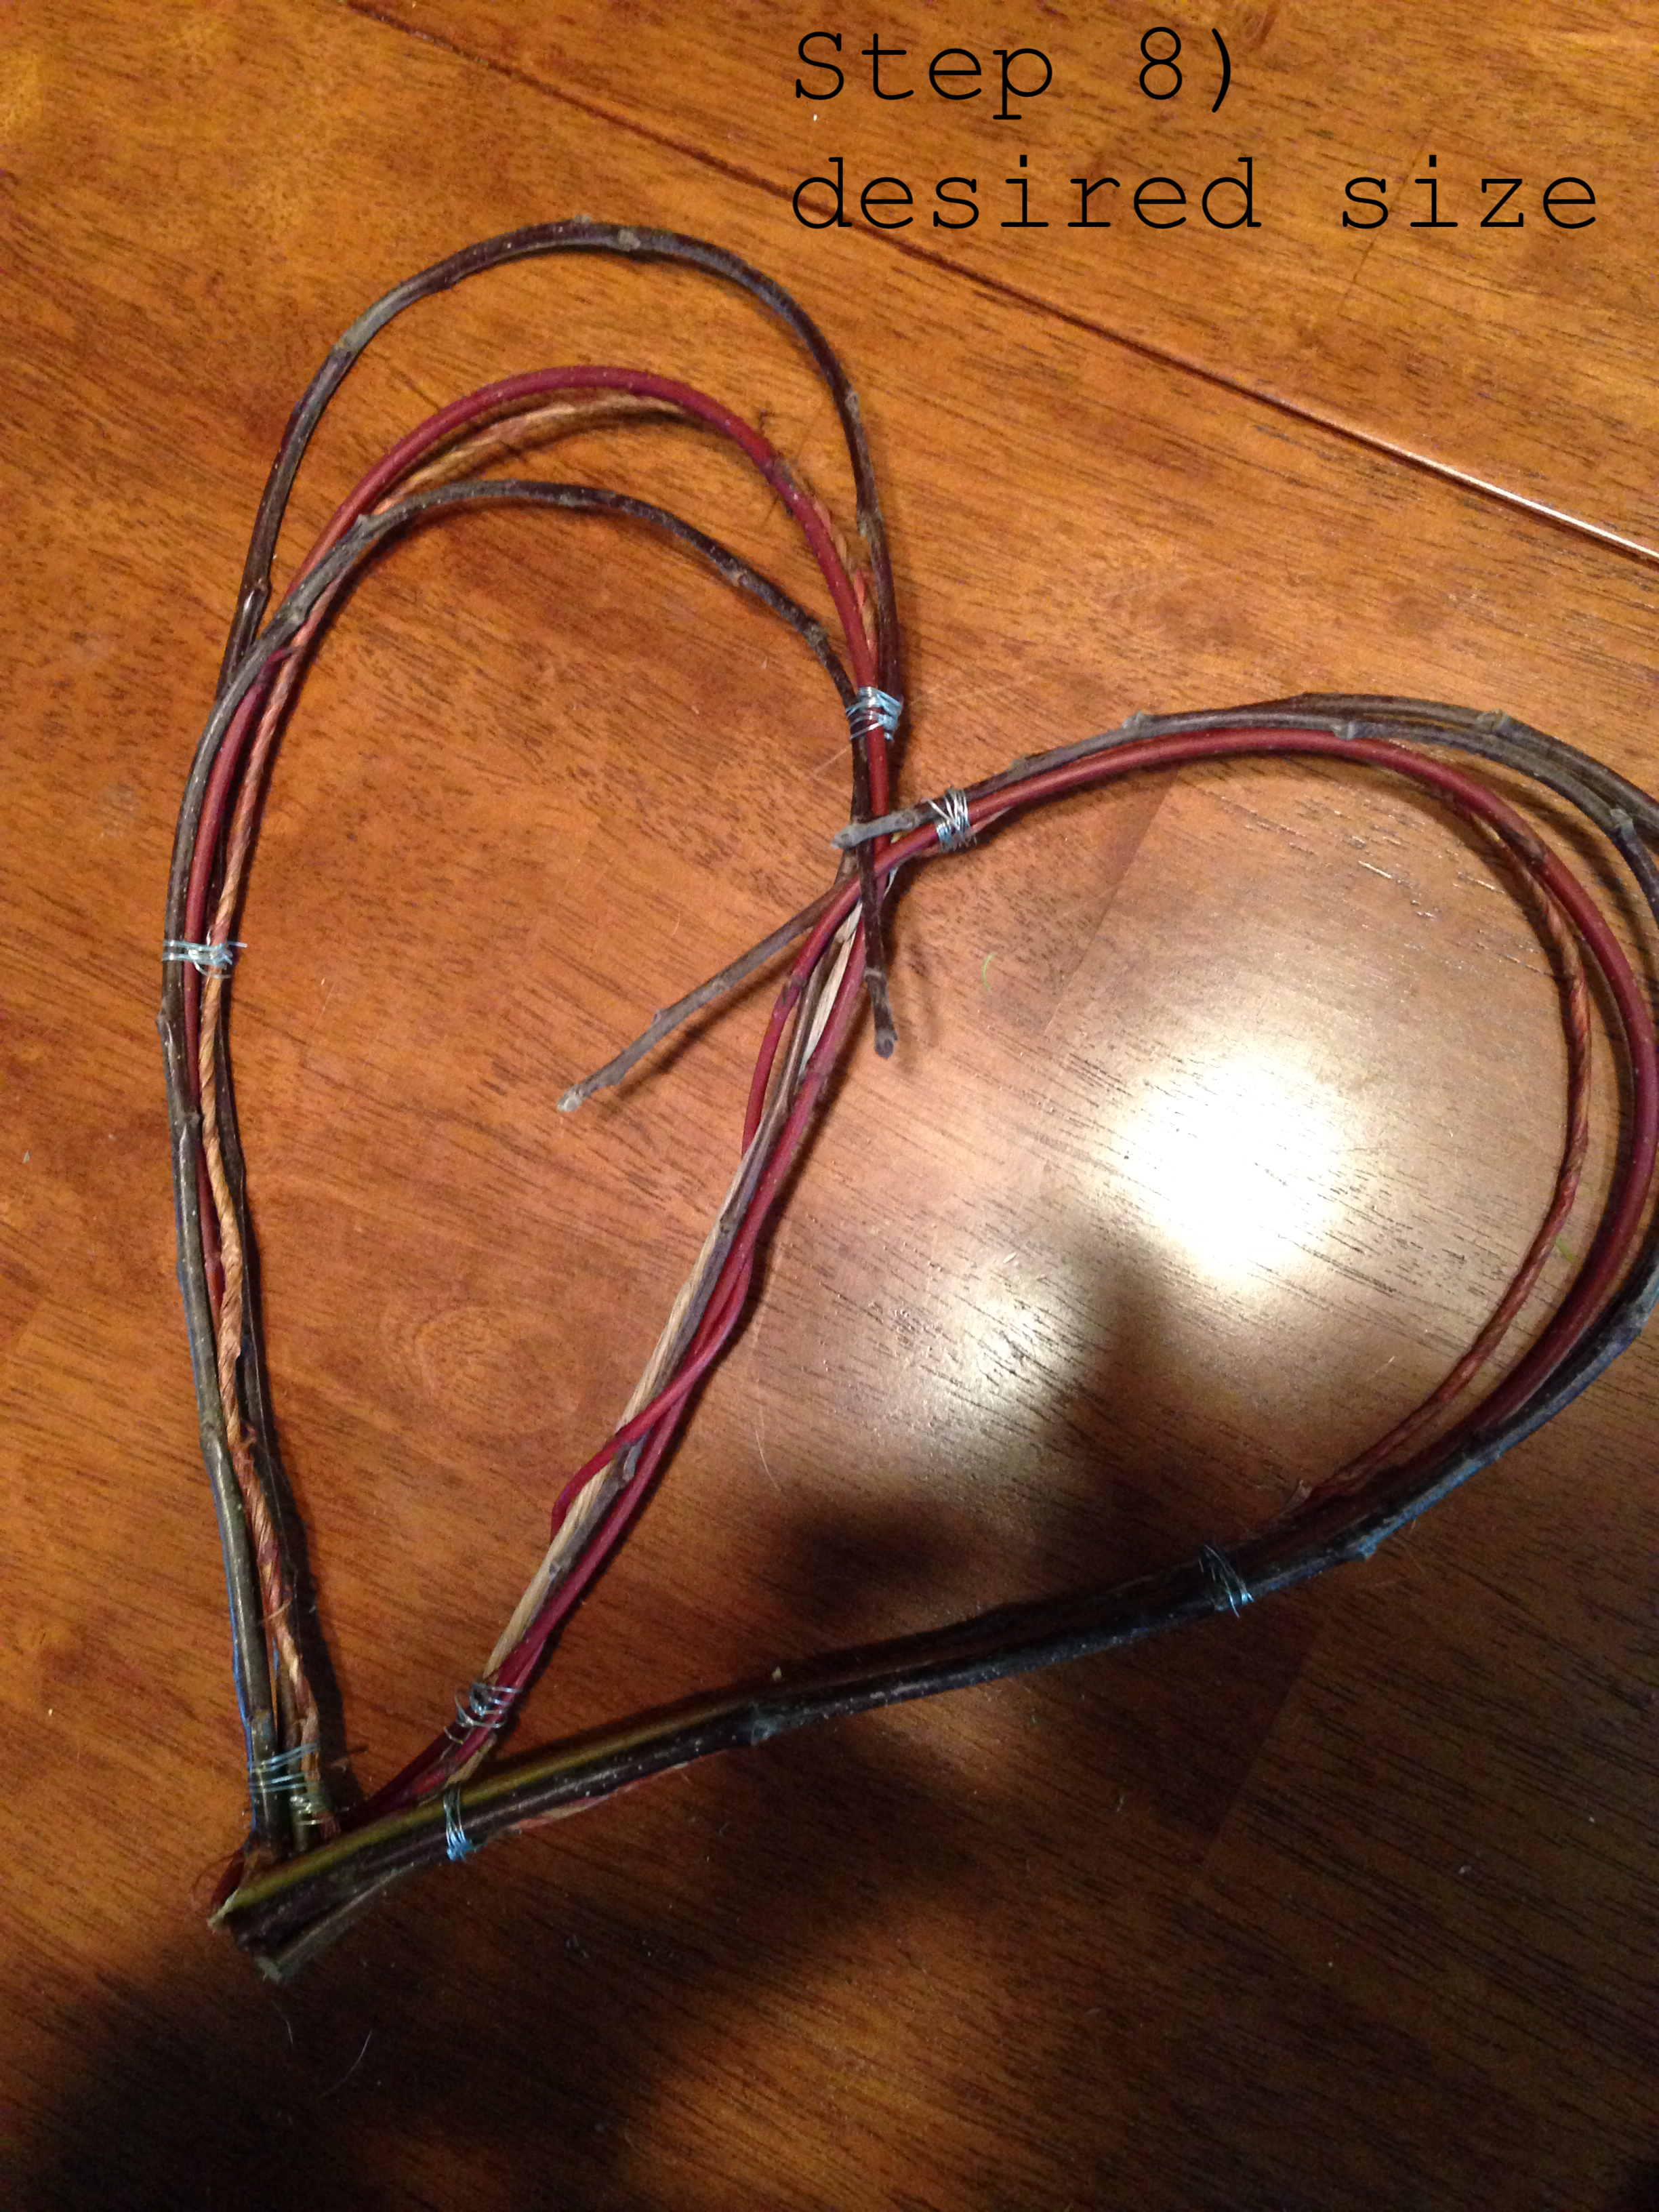
Step 8) Keep repeating until the wreath has reached the desired size. I recommend using 3 branches on each side, but this depends on the side and width of the branches, how big the wreath is, and the effect you are going for. After you have finished assembling the wreath, plug in the hot glue gun.
terrible shadow… oops
Step 9 ) If you would like to further camouflage the floral wire, you can wrap the wired sections of the wreath with brown floral tape. This step is optional.
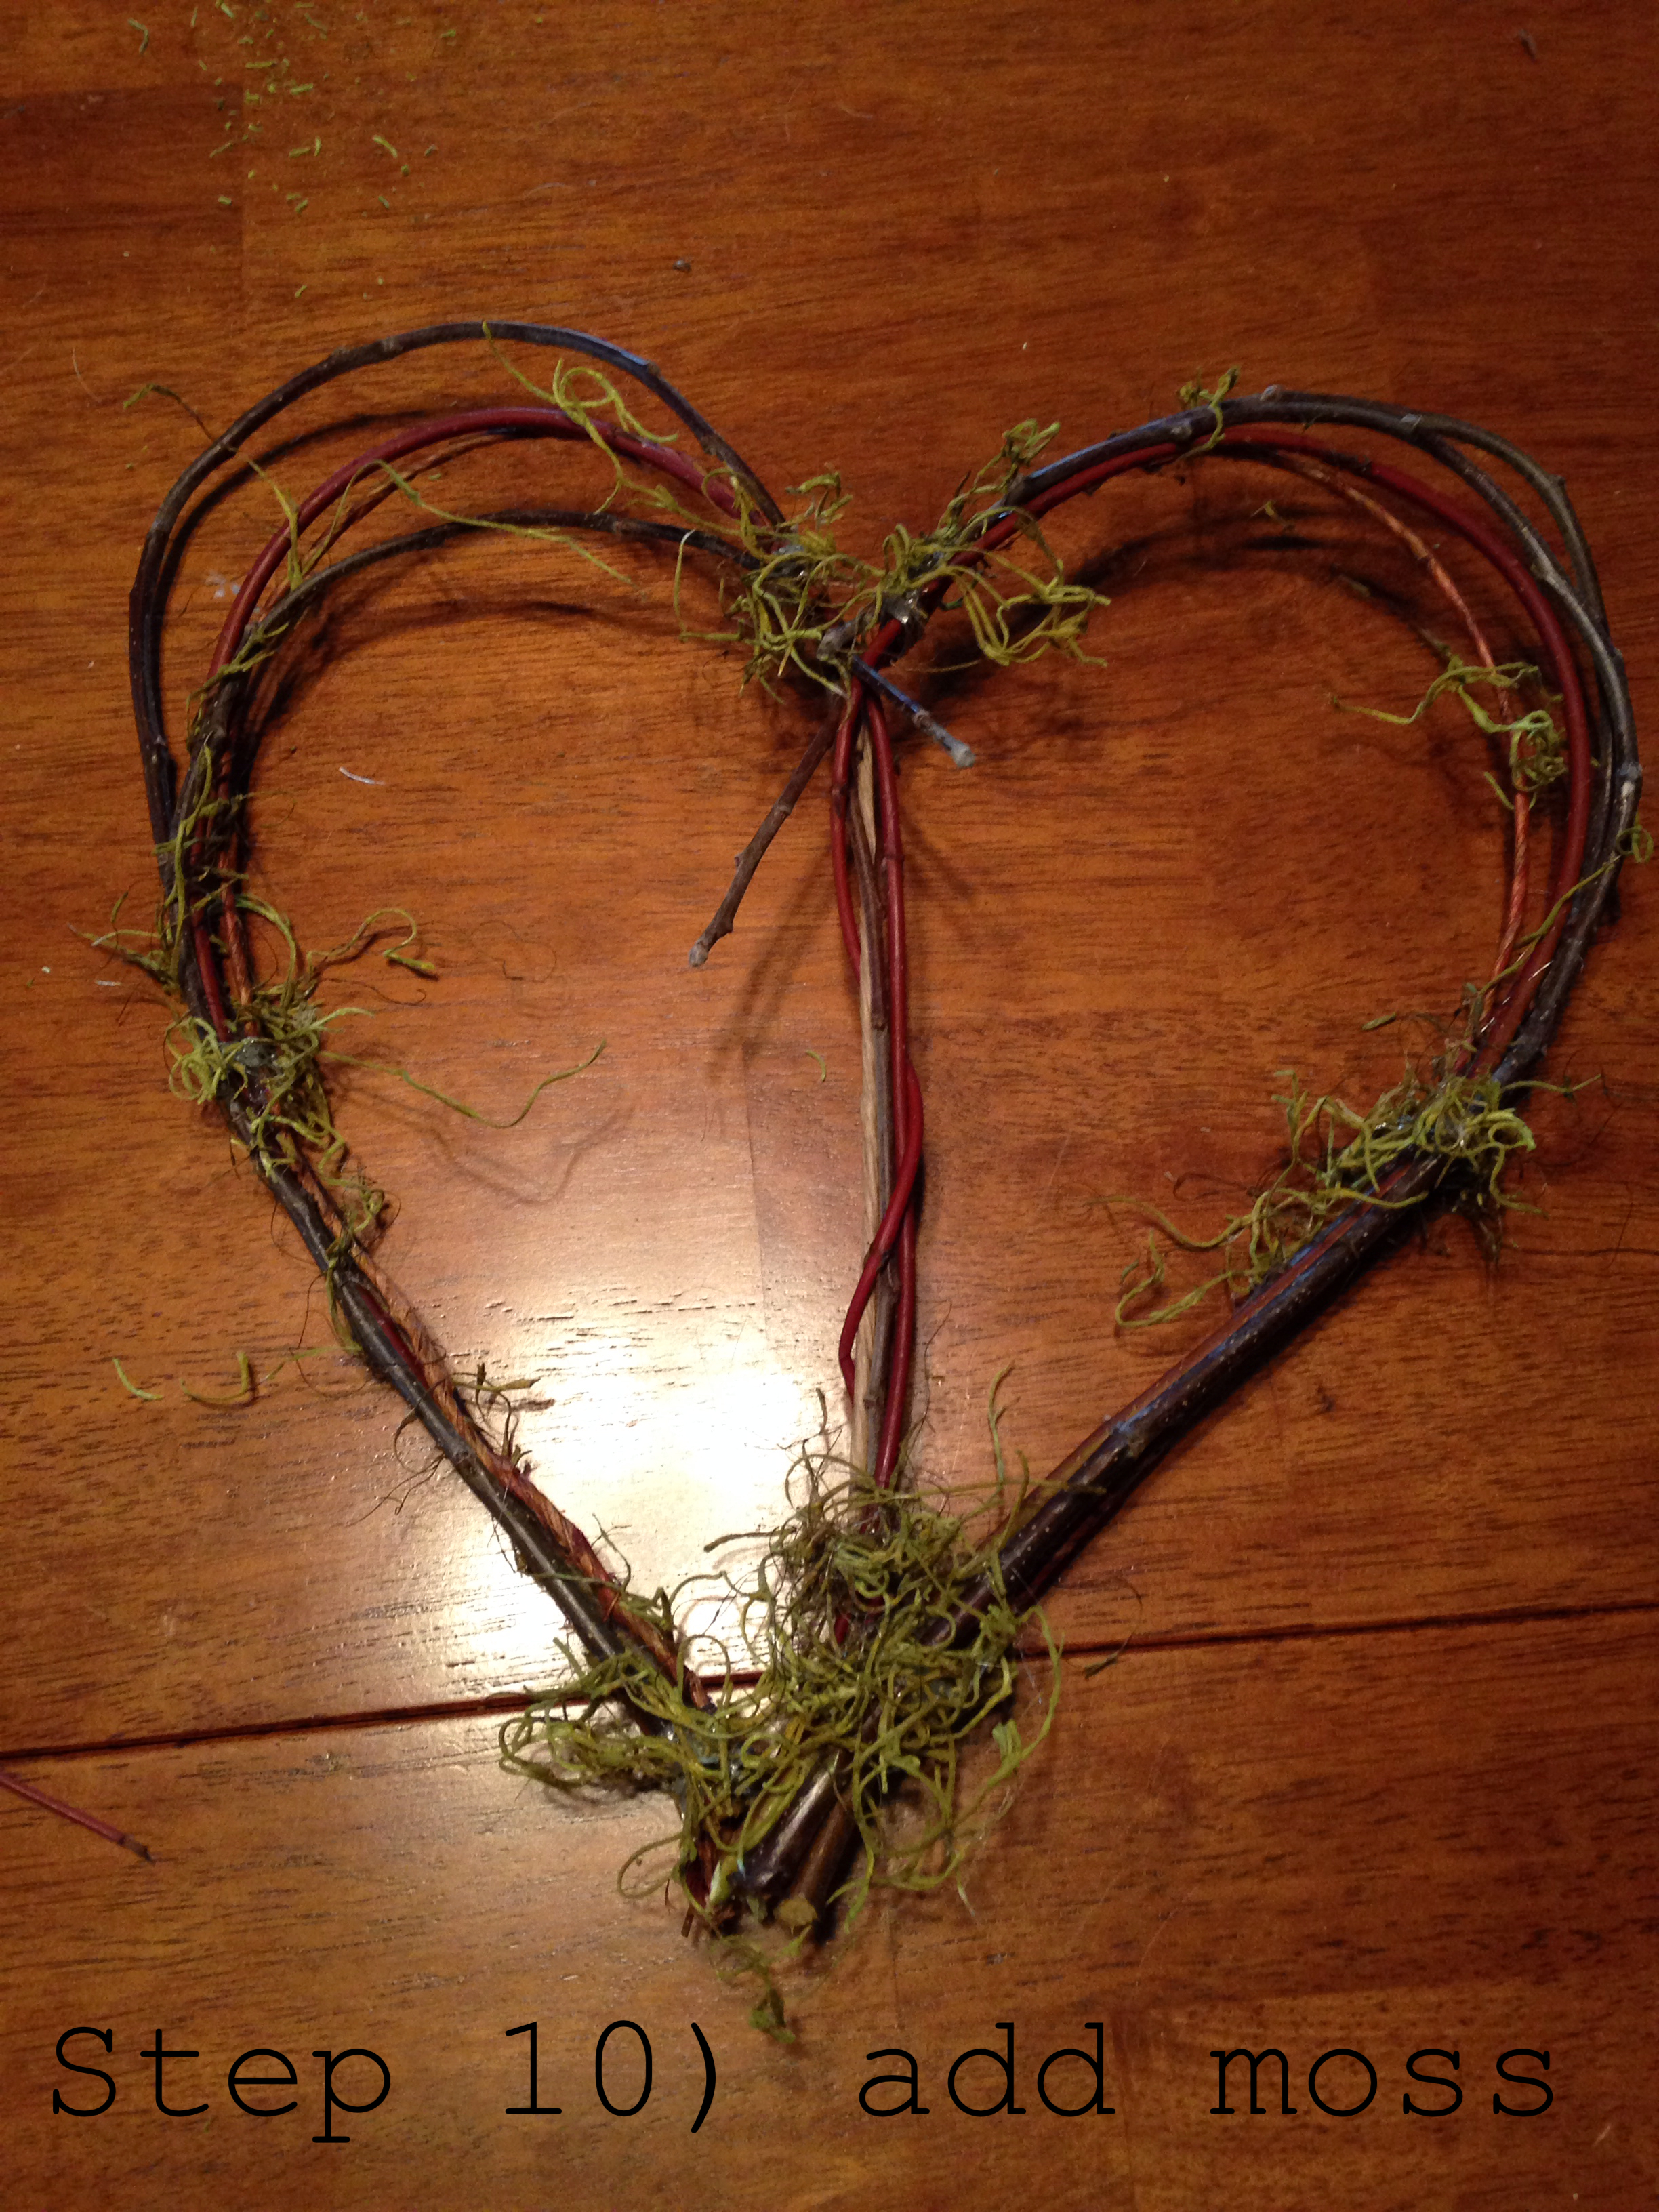
Step 10) Take the hot glue gun, and begin attaching small clumps of moss to hide the wire. The glue will also help reinforce the wire and keep everything together. A little moss goes a long way, and since the Spanish moss is fairly long, you can let some of it dangle, or even weave some of the moss up the branches. Start by hiding the wire on the front and side of the wreath, and if so desired you can also put moss on the back side of the wreath. If you used the floral tape, this probably isn’t necessary.
Voila! You now have a rustic heart wreath, and its pretty charming. And now you probably want to make at least seven more because you realized how easy it was, and how stinking cute they actually are. Hang one on your front door, in your kitchen, on your back porch, give one to a friend, give five to different friends, or maybe even sell them on ETSY, because earlier when I was trying to figure out how much to sell them for I did a search for comparable items, and apparently no one is actually making rustic heart wreaths these days. You are welcome.